How to Make Scones That Rise Tall: Method and Ratios
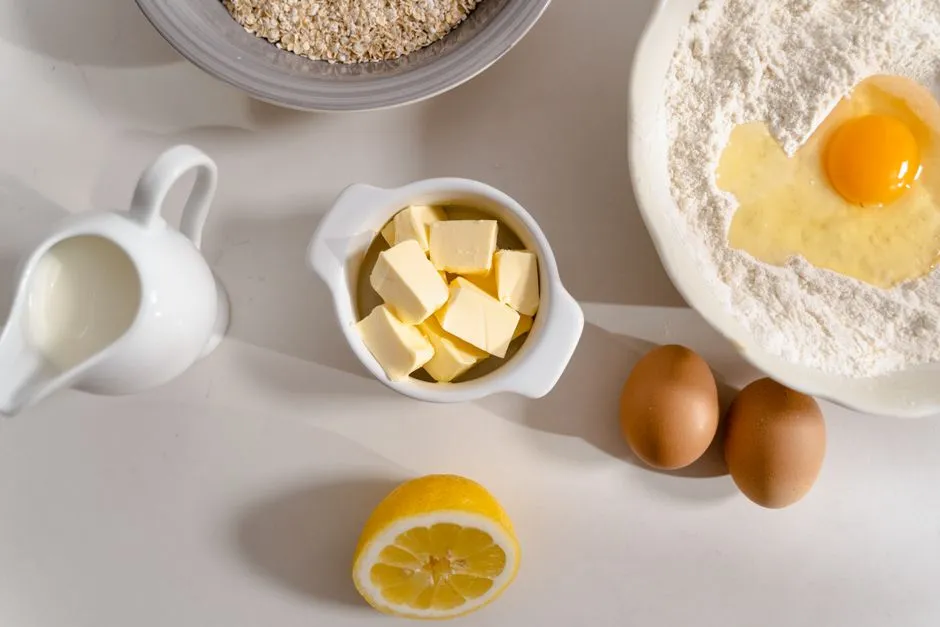
How to Make Scones: The Short Answer
To make scones, rub cold butter into self-raising flour (roughly one part butter to four parts flour), stir in a little sugar and enough cold milk to form a soft, slightly sticky dough, then pat it out thick — at least 2.5cm — and stamp out rounds without twisting the cutter. Bake at 220C (425F, or 200C fan) for 10 to 12 minutes until well risen and golden. Handle the dough as little as possible: a light touch and a hot oven are what produce that tall, craggy rise.
That is the whole method in one paragraph. The rest of this guide explains why each step matters, gives you exact quantities, and works through the most common failure — flat scones — so you can fix it for good.
The Scone Ratio Worth Memorising
Recipes vary in their details, but classic British scones cluster around one dependable ratio by weight:
- 4 parts flour (self-raising, or plain flour plus baking powder)
- 1 part cold butter
- 2 parts cold milk (roughly — add it gradually, because flours absorb liquid differently)
- A small amount of sugar and a pinch of salt
So for 350g of flour you want about 85g of butter and around 175ml of milk. Once you know the ratio, you can scale a batch up for a party or down for two people without hunting for a new recipe. This is the same logic that makes the equal-weights Victoria sponge so reliable: when the proportions are fixed, the method becomes the only variable, and the method is learnable.
Why cold butter matters
Cold butter rubbed into flour leaves tiny firm flecks of fat coating the flour particles. In the oven, that fat melts and releases steam, and the coated flour forms less gluten — which means a tender, open crumb instead of a dense, bready one. Warm or melted butter smears through the flour instead, and the result is heavier. If your kitchen is warm, chill the flour-and-butter mixture for 10 minutes before adding the milk.
Easy Scone Recipe (Makes About 8)
This is a straightforward, tested-style formula using the ratio above. Weights are in grams because scone dough is sensitive to small differences, and cups are simply too imprecise here.
Ingredients
| Ingredient | Quantity | Notes |
|---|---|---|
| Self-raising flour | 350g | Or 350g plain flour + 4 tsp baking powder |
| Baking powder | 1 tsp | An extra boost, even with self-raising flour |
| Fine salt | ¼ tsp | Balances the sweetness |
| Cold unsalted butter | 85g | Cubed, straight from the fridge |
| Caster sugar | 3 tbsp (about 40g) | Keep it modest — scones are not cakes |
| Cold whole milk | About 175ml | Add gradually; you may not need it all |
| Lemon juice | 1 tsp (optional) | Slightly acidified milk gives the raising agent more lift |
| Beaten egg or extra milk | For glazing | Egg gives a deeper golden top |
Method
- Heat the oven to 220C (425F), or 200C fan, and line a baking tray. A properly hot oven is non-negotiable — the initial blast of heat sets the rise.
- Sift the flour, baking powder, and salt into a large bowl. Sifting aerates the mixture and distributes the raising agent evenly.
- Rub in the cold butter with your fingertips until the mixture looks like coarse breadcrumbs with a few visible flecks of butter remaining. Work quickly and lift the mixture as you go to keep it cool.
- Stir in the sugar.
- Add the milk gradually, mixing with a table knife or your hand in a light, cutting motion. Stop as soon as the dough comes together — it should feel soft and slightly sticky, not dry and not wet. You may have a spoonful of milk left over; that is fine.
- Turn the dough onto a floured surface and fold it over on itself two or three times — just enough to bring it together and create a couple of layers. This is not kneading. Ten seconds of handling is plenty.
- Pat (do not roll) the dough to at least 2.5cm thick. Thin dough is the single most common cause of flat scones. Thicker is safer than thinner.
- Stamp out rounds with a 5cm cutter, pressing straight down without twisting. Twisting seals and drags the cut edges, which stops the scone rising evenly. Re-form the offcuts gently and cut again — the second batch is never quite as tall, which tells you everything about how much handling matters.
- Place on the tray, glaze the tops only with beaten egg or milk. If glaze drips down the sides it can glue the edges and hinder the rise.
- Bake for 10 to 12 minutes until well risen and golden on top. A finished scone sounds slightly hollow when tapped underneath and feels light for its size.
Cool briefly on a wire rack. Scones are at their absolute best warm, within a few hours of baking.
Why Are My Scones Flat? Troubleshooting Guide
Flat scones almost always come down to one of six causes. Work through this table in order — the fix is usually in the first three rows.
| Problem | Likely cause | Fix |
|---|---|---|
| Flat and dense | Dough patted out too thin | Pat to at least 2.5cm — closer to 3cm is even safer |
| Flat and tough | Overworked dough (too much gluten) | Mix only until it just comes together; fold 2-3 times, no more |
| Risen but lopsided | Cutter twisted on the way down | Press straight down, lift straight up |
| Spread outward instead of up | Dough too wet, or oven not hot enough | Add milk gradually; fully preheat to 220C before the tray goes in |
| Pale and poorly risen | Stale raising agent | Baking powder loses strength over time — if it doesn't fizz in warm water, replace it |
| Heavy, greasy crumb | Butter too warm when rubbed in | Use fridge-cold butter and chill the rubbed-in mix if your kitchen is warm |
One more quiet culprit: old self-raising flour. The raising agent already blended into the flour weakens as the bag ages, which is exactly why this recipe adds a teaspoon of baking powder even when using self-raising flour. It costs nothing and insures the rise.
Scone Recipe with Self-Raising Flour vs Plain Flour
Self-raising flour is simply plain (all-purpose) flour with baking powder already mixed in, and it is the traditional choice for British scones because it saves a step and distributes the raising agent evenly.
- Using self-raising flour: follow the recipe as written. The extra teaspoon of baking powder is a safeguard, not a mistake.
- Using plain flour: add about 4 teaspoons of baking powder per 350g of flour, sifted together thoroughly so there are no bitter pockets.
- US bakers: all-purpose flour plus baking powder works well. Avoid substituting baking soda alone — it needs an acidic ingredient (such as buttermilk) to activate, and the proportions are not interchangeable with baking powder.
Buttermilk deserves a mention here. Swapping the milk for buttermilk — or acidifying regular milk with a teaspoon of lemon juice — gives the raising agent a slightly stronger reaction and adds a pleasant tang. It is the easiest single upgrade to this recipe.
How to Make Scones Rise Higher: Five Rules
If your scones are decent but you want bakery-tall, these five habits make the difference:
- Go thick. Pat the dough to 3cm. A tall scone starts as tall dough — no oven can double a 1cm disc into anything impressive.
- Keep everything cold. Cold butter, cold milk, cool hands. Cold fat holds its structure until the oven's heat turns it into steam and lift.
- Handle the dough for seconds, not minutes. Every extra fold develops gluten, and gluten fights the rise. The dough should look shaggy and slightly rough — that roughness becomes the classic craggy top.
- Cut clean, never twist. A sharp cutter pressed straight down leaves the layered edges free to spring upward. Twisting smears them shut.
- Bake hot and don't open the door. 220C from the first second. The rise happens in the first few minutes; a cool oven or an opened door lets the structure set low.
A useful mental model: a scone rises on a short, violent burst of steam and carbon dioxide. Everything on this list either protects that burst (cold fat, fresh raising agent, hot oven) or removes obstacles to it (thick dough, minimal gluten, unsealed edges).
Serving Scones Properly
Scones are the anchor of the middle course of a traditional afternoon tea, served with clotted cream and jam. Whether the cream or the jam goes on first is a famously contested question between Devon and Cornwall, and we will not pretend to settle it — both orders taste wonderful, and the argument is half the fun.
A few genuinely useful serving notes:
- Serve warm. Scones fade fast. If they were baked earlier in the day, refresh them in a 160C (320F) oven for about 5 minutes.
- Split by hand, not knife, if you like the traditional texture — a fork or gentle twist along the natural seam gives a better surface for cream.
- Pair with a robust black tea. Assam or an English breakfast blend, brewed with water at or near a full boil, stands up to the richness of clotted cream. Our guide to brewing tea properly covers times and temperatures by type.
Storing and freezing
- Room temperature: best eaten the same day; acceptable the next day in an airtight tin, refreshed in the oven.
- Freezing baked scones: cool completely, freeze in a sealed bag, and reheat from frozen at 160C for about 10 minutes.
- Freezing unbaked scones: even better — freeze the cut rounds on a tray, bag them once solid, and bake from frozen at 220C, adding 2 to 3 minutes to the baking time. You get fresh-baked scones on demand.
The Takeaway
Scones are one of the fastest bakes there is — under half an hour from cupboard to table — and the entire craft lives in restraint. Memorise the 4:1:2 ratio of flour, butter, and milk. Keep the fat cold, the handling brief, the dough thick, and the oven properly hot. Cut straight down. Do those five things and a tall, tender, golden batch stops being luck and becomes routine — which is exactly what you want from the bake that holds the whole tea table together.